Archive for the ‘photography’ Category

Actuality – photography – NYC

Sunday, January 22nd, 2012

During our recent NYC trip,  after spending some hours walking the very chilly Manhattan streets, we decided on a coffee stop to warm up.  On the way in we were approached by a guy who asked if we could help him out with a coffee.  He looked far colder than we were so we invited him in to join us.

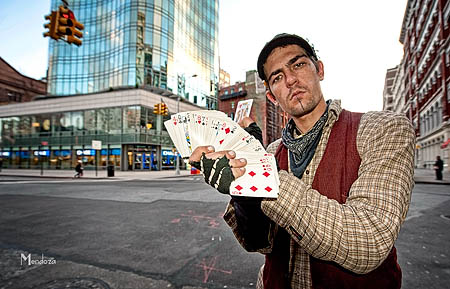
Over the coffee, Jack Crow entertained us with our very own personal close-up magic show – which was really impressive.  He then let us onto the secrets of how he had done the tricks…which was even more impressive, but I won’t share those with you!

Jack also related a little of his chequered career, which included travelling with a circus and a trip to England, where he did not manage to see anything apart from the inside of the airport;  the Border agencies held him, due to his lack of funds, before returning him the same day to the USA.  Despite the slightly precarious lifestyle he seemed very positive…outlining his plans to enrol to study recording techniques (he is also a musician).

He survives by performing his magic in the Manhattan streets and subway, spending nights sleeping rough in shop doorways – if you imagine temperatures around 7 degree Fahrenheit coupled with 20 mile an hour winds, that is one tough way to survive.

Photography – the technical background to the images

I shot Jack in the cafe, then suggested we shoot outside, his normal performance arena, to which he readily agreed. This was my first opportunity to put my Nikkor 14-24mm wide angle lens through it paces. By now it was dusk, so I racked the ASA up to 800 on the Nikon D700 and added fill-in flash. Even so I was shooting on F4.5.  The wide angle of the lens meant I needed to get within 3 feet of Jack to make him dominate the frame…I love the wide-angle distortions, which I feel adds impact.  The first image was taken with me crouching at knee level.

Jack Crow - magician NYC

Jack Crow - magician NYC


Jack Crow - find the card

Jack Crow - find the card


Beauty photoshoot – make-up makes the image!

Wednesday, January 18th, 2012

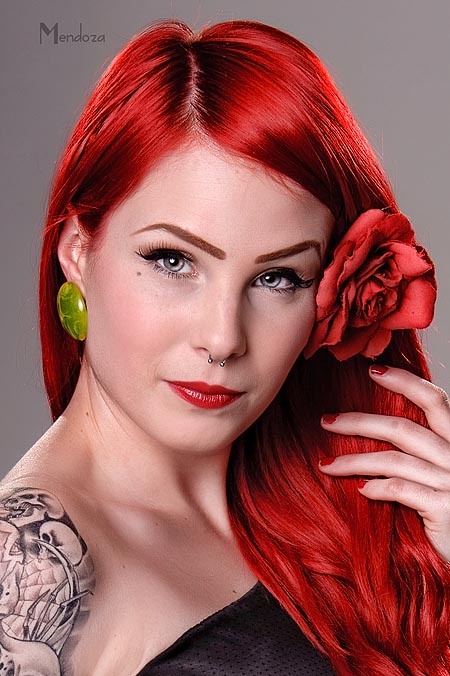
This week I had the pleasure of Leanne James at the studio, shooting some tattoo shots, and some more ‘way out’ ones.  Just in case you don’t know who Leanne is, she graces the cover of the current edition of Skin Deep magazine.  She is with Spirit Model Management, an agency with a great range of interesting alternative models.

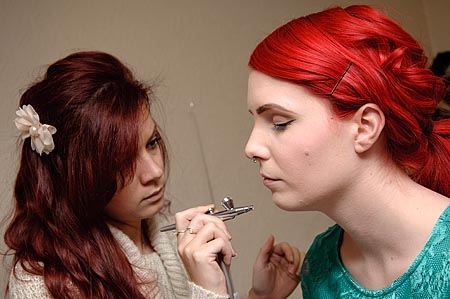
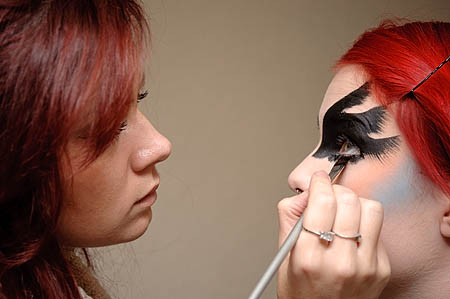
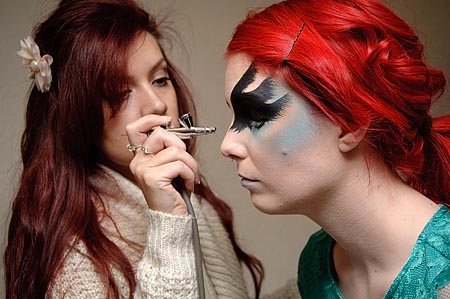
Shonagh Munday came along to provide her make-up and hair styling talents.  She is a really excellent stylist and make-up artist and lately she has been making a name for herself with her airbrush skills.  Using her exceptional skills the face becomes a canvas…with stunning results.  I guarantee you will be seeing a lot more of her work – check out her blog and you will see why I am so confident!

Leanne James - alternative model

Leanne during the first 'tattoo oriented' part of our shoot

Starting the second make-up look with the airbrush

Starting the second make-up look with the airbrush

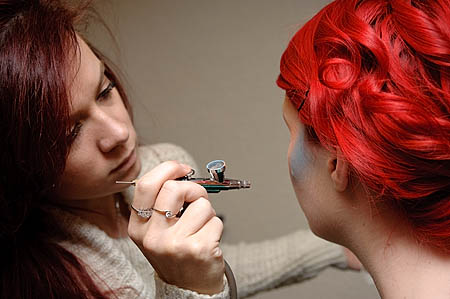
Shonagh builds up the shading

Shonagh builds up the shading in subtle steps

Applying black make-up by painting freehand

Applying black by painting freehand

Final make-up airbrush with matt black

Final airbrush with matt black to complete the look

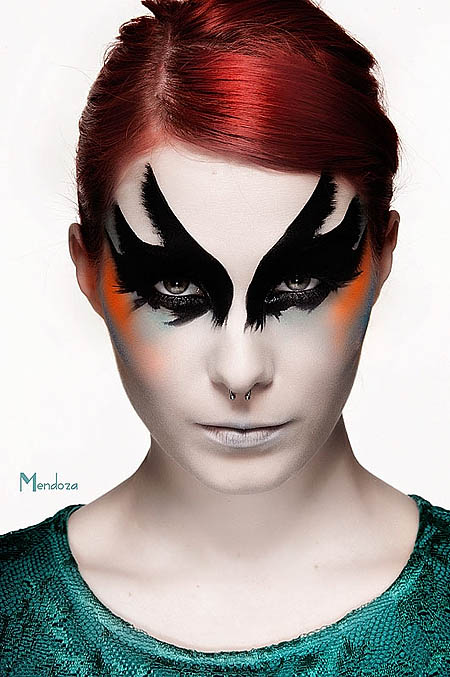
The finished look!

The finished look - what a change from the first image above!

The eyes have it – photography tips

Sunday, January 15th, 2012

When looking at a portrait, we are immediately drawn to the eyes. They are without doubt the most important part of the image in conveying emotion.

As a photographer it is important to ensure eyes are tack sharp.  If your camera will allow you to lock focus one handy trick is to centre the eyes, press the focus button (generally a partial depression of the shutter release button), then, with the focus locked on the eyes, recompose the image to bring the eyes to the position you need.

Marianne Cheesecake - burlesque artiste

Head posture

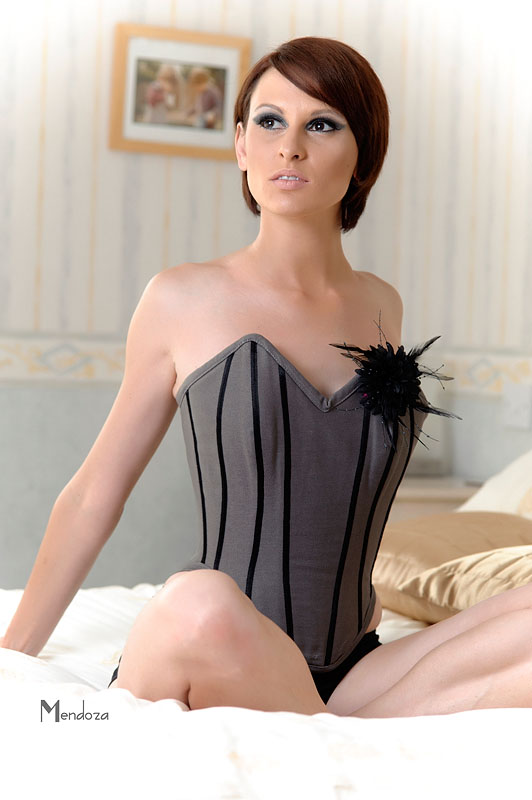
Looking square-on into the camera will produce an intense contact with the viewer (as in the above portrait of burlesque artiste Marianne Cheesecake.

If the model looks at the lens, then turns her head slightly, the viewer gets to see one side of her face, and often this will produce a more pleasing composition.  However as she turns, firstly the catchlight ‘sparkle’ will be lost from the eye on the further side of the nose, then ultimately the far eye will be lost altogether.   I personally find such ‘one-eyed’ portraits aesthetically disconcerting.   Below Lisa Chenneour is looking slightly away from the camera – she could have kept the same head posture and directed her eyes back to the camera – either way the catch-lights in her eyes are both visible.

Strong photographic composition

A great way to compose and know you have a strong image is to have the eyes approximately one third of the way into the frame .  (this is a composition “rule”, which imagines your image area split into three, both horizontally and vertically – align the most significant part of the image on one of those lines or, better, where a horizontal and vertical cross, to achieve an image that will have a headstart at being aesthetically pleasing.
Get a sparkle in the eyes. Shooting outside it is a good idea to shoot with the sun behind the model, and use your camera flash to fill in what would otherwise be a shadowed face – it also creates that sparkle in the eye.   Without the catchlights eyes may look tired or “lifeless”.

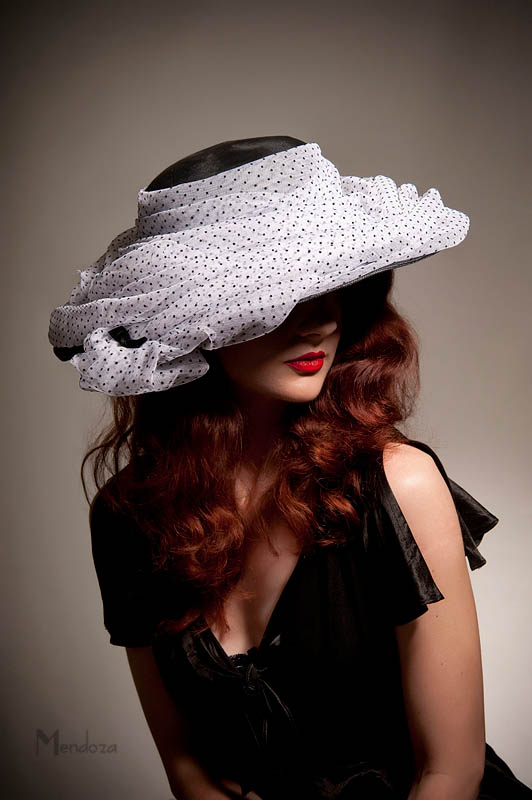
Naturally every ‘rule’ is made to be broken. Letting a deep shadow, or the brow of a hat, obscure the eyes can create an image with an air of mystery. Check out the image below of retro model Jean Rae, taken for the vintage hat designers Rose Patricia Millinery.

Jean Rae - note the mysterious feel due to the shadowed eyes

Jean Rae - note the mysterious feel due to the shadowed eyes

Grand Central

Wednesday, January 11th, 2012

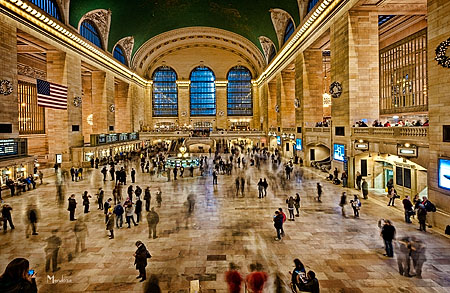
Anxious to try out my new 14-24mm Nikkor, we visited Grand Central station.  I love the “ghost travellers” caused by an extended time exposure so I invariably end up shooting a similar shot to this on each visit!  For optimum quality I selected 200ASA (the lowest on the Nikon D700), and a small aperture which gave me a time exposure of 7 seconds. The key to such shots lies in the camera remaining rock steady during the exposure. A tripod is the ideal but this is not always practical (or allowed) in such public areas. fortunately there is a wide walled balcony overlooking the main concourse, so this was a great stable “mount” for the camera.

Grand Central Station

Grand Central Station - yes, and some HDR enhancement!

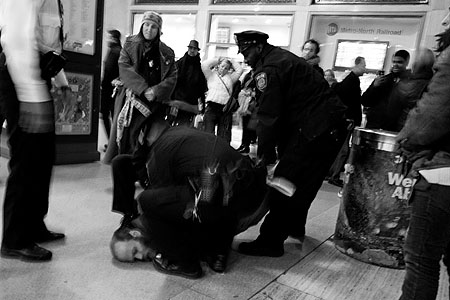
No sooner had I got the shot when a commotion broke out below me, with chanting demonstrators facing police. Unexpectedly I got the opportunity to try my hand at reportage!  This taught me two valuable lessons – in order to get a meaningful image using a really wide lens, it is necessary to get the camera right in the thick of the action! That was probably a little foolhardy of me. Secondly, you need to know your camera well enough to instinctively adjust camera settings on the fly. I was shooting by available light, so racked the sensitivity to 1000ASA; however this was nowhere near fast enough, so by the time I realised this I had probably lost the best shot.

Arresting demonstrator


The photographers’ dream store…

Monday, January 9th, 2012

On our recent trip to NYC We visited Chelsea Market.  There are numerous trendy niche outlets, offering such goodies as flavoured salts…you can taste each variety…just be careful as one variety is hot enough to make your mouth burn for ages after!

Nestling in the middle we came across a ‘pop-up’ arts collective selling everything from clothing created from zip-fasteners to paintings. I was particularly struck by the photographic work of Bryan Close (thelightdynamic.com).  One very dramatic work was shot in the Manhattan subway system, and was an ultra-wide view shot with available light.  I was fortunate to meet Bryan and discussed how the picture came to be shot…it was shot with (from memory) a 14mm lens. It is wisest if I don’t reveal how he came to be in that specific location!

Just a little shopping trip…

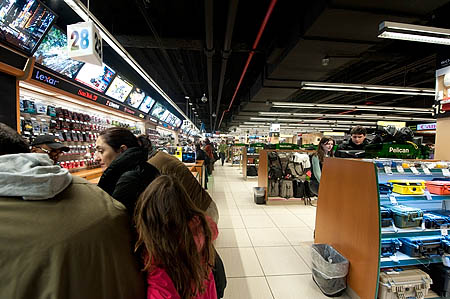
A couple of days later found us at B&H Photography store. No photographic trip to Manhattan is complete without a visit to this superstore.

B & H photography store in Manhattan

One small corner of B & H's amazing camera superstore

(The above test was shot with the Nikon 14-24mm Wide-angle zoom lens, on the widest setting, using the Nikon D700, handheld on 1200ASA)

This store is possibly the best photographic store in USA, if not the world!  Spread over three floors, all photographic gear is on sale, with a plethora of photo experts on hand.  You can play and compare the latest gadgets and gizmos to your heart’s content.

At the Nikon counter I recalled Bryan’s image, which is how I came to be playing with several monster wide angle zoom lenses, sporting front elements like fish-bowls, and price tags that don’t bear thinking about!  Despite its weight  I still managed to sell myself on the Nikon product,  so I was delighted to find a mint version of the lens  in their used department – at a significant price saving.  So now, expect to see a large number of wide-angle shots in my portfolio!

Photo tips – easy tips for better photographs

Sunday, January 8th, 2012

So often I’ve heard the remark “Your pictures look good – but of course you’ve got an expensive camera”.   The reality is that a better camera will allow better clarity,  so photos can be printed out in larger sizes, but that is certainly not the essence of a good image. Getting a good photo is far more about technique than about having the biggest baddest best camera!  There are a host of really simple techniques you can apply to give your photographs the “wow” factor.

What is the subject for your photo?

There should always be a reason why you want to preserve what you are seeing in front of you when you switch on your camera. Be aware of the subject and compose your shot accordingly.

Make your subject “fill the frame”.

If it is a person – move in close, or use the zoom to fill the frame. Often, if on holiday it will be your loved one in foreign surroundings.

Elementary error: getting your loved one to stand back so you can capture the scene along with them.

Result: a scenic view with a tiny tiny family member in the background.

Instead  set your zoom to a wide setting, then get your subject to move close enough to the camera to be dominant in the frame (the wide setting should ensure the foreground family member and the scene behind are both in focus).

When taking a picture of a person, don’t leave their head in the middle of the frame – lower the camera lens a tad to bring their eyes to the top third of the frame – far more impact!

Why stick at eye level when you shoot?

You will produce a more interesting view by standing high or getting low and shooting upwards.

Taking pictures of your toddlers?

Wait until they are absorbed in play, then get right down to their eye level to shoot.

Want your models to have mile-long legs?

Shoot from their knee height!

Model blinks at every flash?

Give them a count-in to prepare them

If your model is looking out of the frame, to the side of the camera, your composition will look better balanced with a little more space on the side of the frame where they are looking…so-called ‘looking room’

A slightly off horizontal horizon looks wrong – add drama by tipping the camera much further – technically known as a Dutch Tilt.

Shooting outside?

  • Get the maximum from your camera lens by using a lens hood – it prevents unwanted light hitting the lens at an angle and creating flare.
  • When shooting in sunlight, get the sun behind your model and use your flash ( on pocket cameras there is often a setting for ‘force flash on’). Not only is it a very pleasing effect, but it overcomes the ‘screwed up face phenomenon’ where your model is squinting into the light!
  • When shooting people in overcast conditions it is also worth experimenting with using flash, especially if you can reduce its intensity a little – it will add punch to your images.

So, for instantly better photographs, instead of upgrading your kit…upgrade your technique!